Landscape photography: 25 simple tips for better pictures
The best tips on landscape photography . With my simple guide, you'll instantly succeed in taking better landscape photos .
I give you tips on the correct camera (DSLM or DSLR), the best lenses for great landscape photos, and the right camera settings , such as aperture and ISO value .
I'll also tell you what to look for in your composition. You'll find 25 simple tips that are guaranteed to help you take great landscape pictures.
Hi! Wir sind Biggi & Flo
Wir nehmen dich als Reisejournalisten mit zu den schönsten Orten der Welt!
Werbehinweis: Alle mit einem * markierten Links sind Werbelinks.
Landscape photography: The top tips for beautiful landscape shots
Here you will find an overview of the most important tips for landscape photography:
- Use a tripod and remote shutter release
- Shoot in RAW format
- Aperture value between 8 and 11
- ISO value as low as possible (100 or 200)
- Set focus correctly (hyperfocal distance or infinity)
- Observe the rule of thirds
- Observe the lines
- Use a nice foreground
- Shoot in the morning or in the evening
- Change your perspective as often as possible
The composition: the most important thing in landscape photography
I’ll start my landscape photography tutorial with the most important element for landscape photographers: image composition. An expensive camera does not automatically make good pictures and even with a smartphone you can – if you do it right – take great landscape pictures.
The rules of composition always apply to landscape photography, whether you’re shooting with an expensive professional DSLM or a cell phone. Follow my tips and you will easily succeed in taking beautiful landscape pictures.
1. The main subject: good or bad landscape photo
Make one thing clear before you press the shutter button of your camera: What exactly is the subject of your photo? Many beginners (and to some extent experienced photographers) arrive at a beautiful place and release the shutter without thinking about what the main subject actually is.
You know the effect for sure. “But it looked much nicer in real life,” you often hear when someone shows you their pictures. Why is that? The human brain is capable of masking out unimportant parts of a beautiful scene – the camera can’t do that.
So the goal must be: The photo looks much better than reality. A good photographer, therefore, considers very carefully before each picture which motif he wants to show in the picture. Is it the vastness of the landscape in the light of the setting sun? Or is it just a small part of the landscape in the distance?
2. Change your perspective for great nature shots
One of the most important rules in landscape photography is: change your perspective – as often as you can! I see photographers all the time who are so focused on one subject that they forget everything around them.
It’s extremely important that you perceive your entire environment as a possible subject and not just the supposed main subject. Look around, what is happening behind your back? Then move away from your point of view. Often 20 meters are enough to get a completely new attitude.
Try it also once from the frog perspective. You can also use different focal lengths and switch between landscape and portrait format. That way, you’ll get not just one or two great shots at a single photo spot but dozens.
If you’re serious about photography and not just chasing after pretty Instagram pictures (which has unfortunately become a trend the past few years), you’ll also let your eye wander.
There are bound to be many other exciting things on the way to your main subject, right?
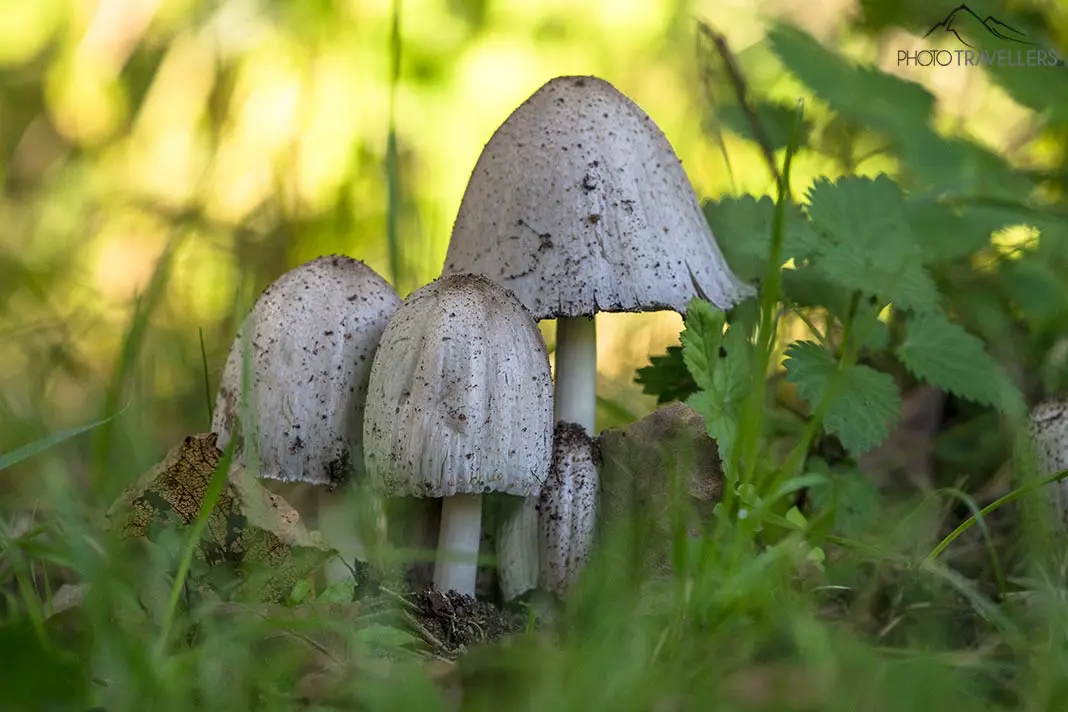
Like the spider web sparkling in the light of the low sun? Or mushrooms on the forest floor just waiting to be photographed.
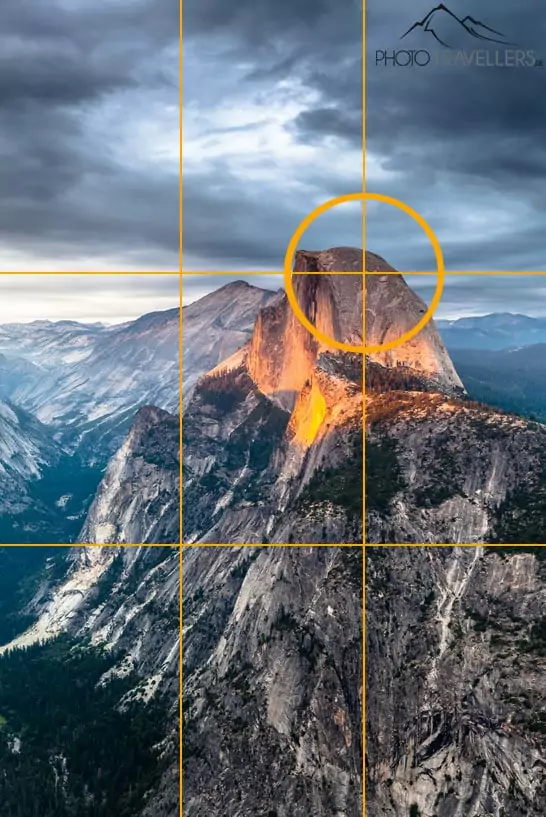
3. The rule of thirds
A central horizon corresponds to our visual habits. In landscape pictures, however, this usually looks boring. So follow the rule of thirds, where either one-third of the sky or one-third of the foreground is visible.
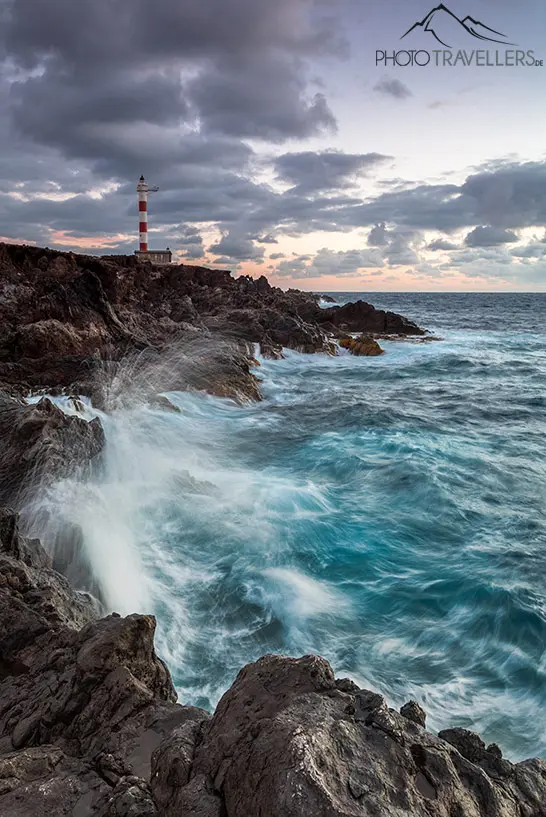
The same applies to the main subject. The lighthouse on the coast in stormy seas is particularly impressive when placed using the rule of thirds, which is based on the golden ratio theory of proportion.
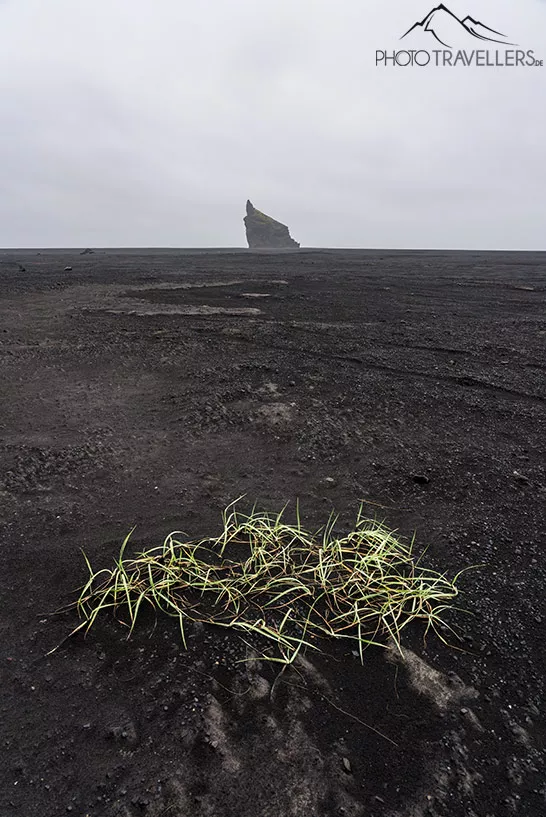
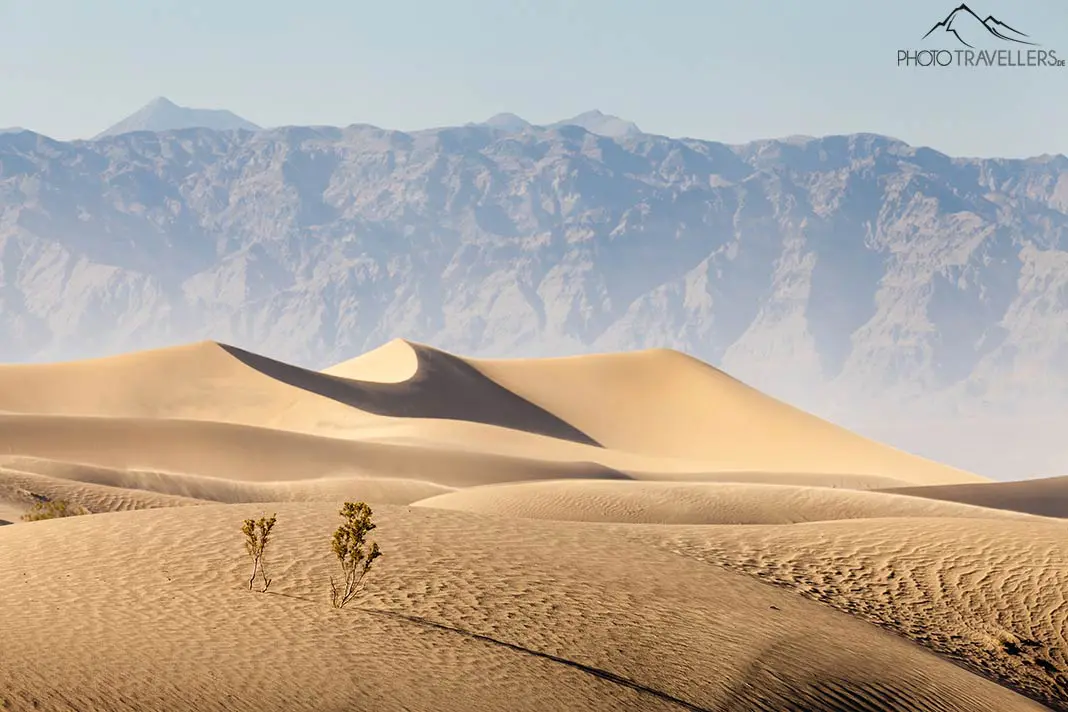
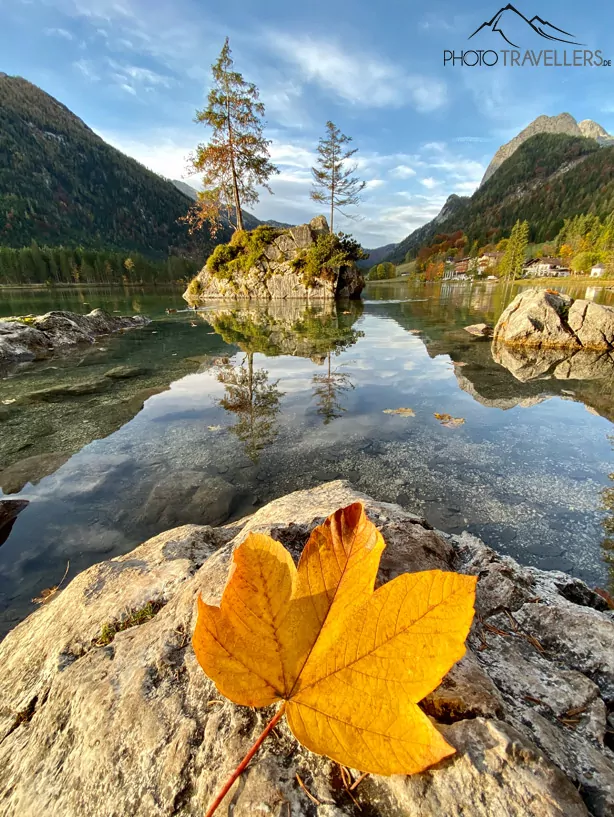
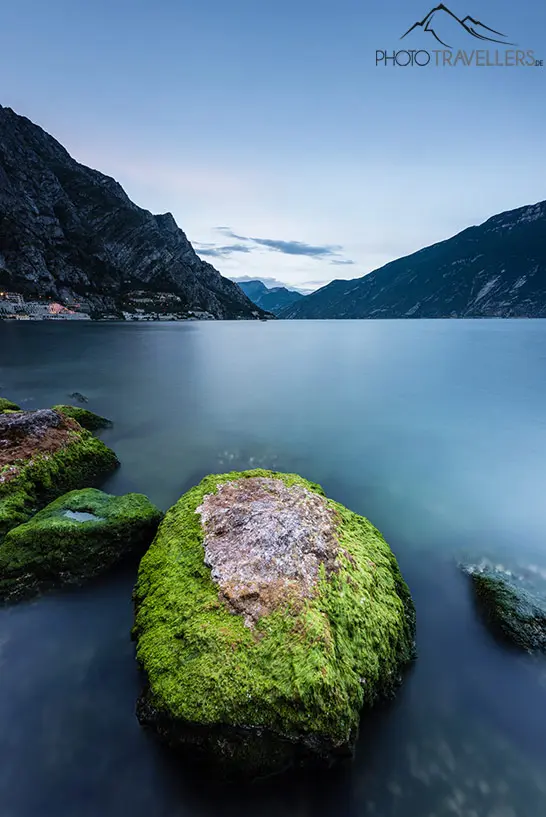
4. Choose an imposing foreground for impressive landscape photos
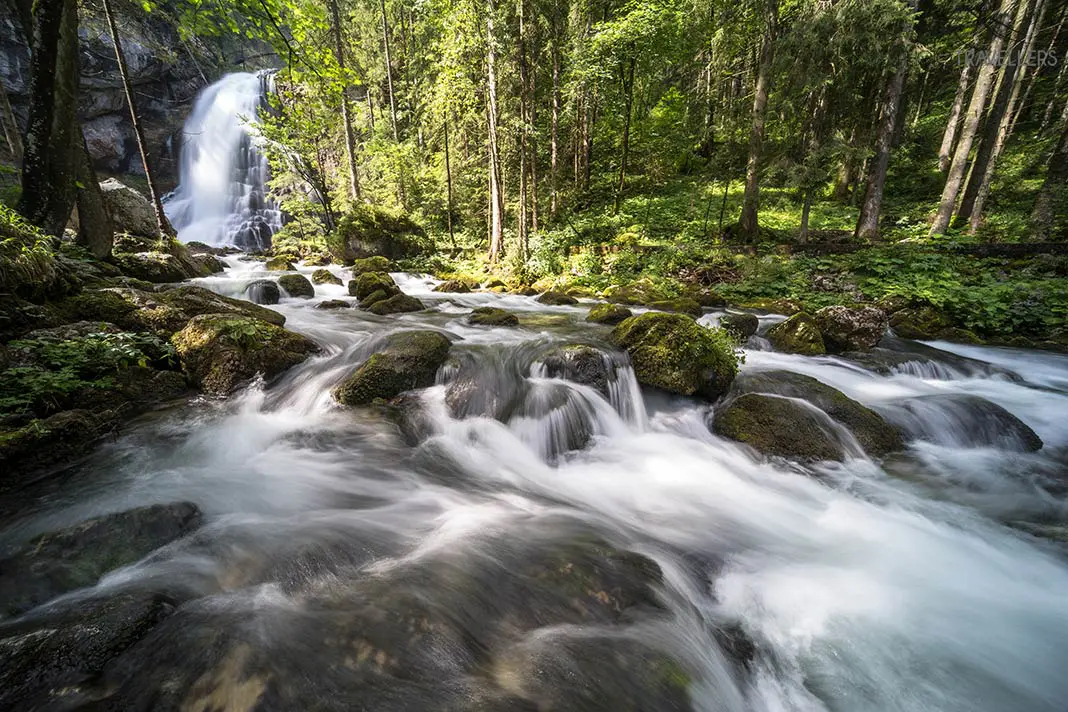
Especially if you’re shooting with an ultra-wide angle lens, you’ll want to think about an exciting foreground. A rock that stands out, large flowers, a pattern in the rock, or the surf by the sea are all great ways to add incredible depth to your landscape photos and really draw the viewer into the image.
With a wide-angle lens, you can also get extremely close to the foreground. The foreground may then also take up a large part of the photo. It’s also worthwhile to change the perspective, for example, to get down on your knees and shoot very close to the ground.
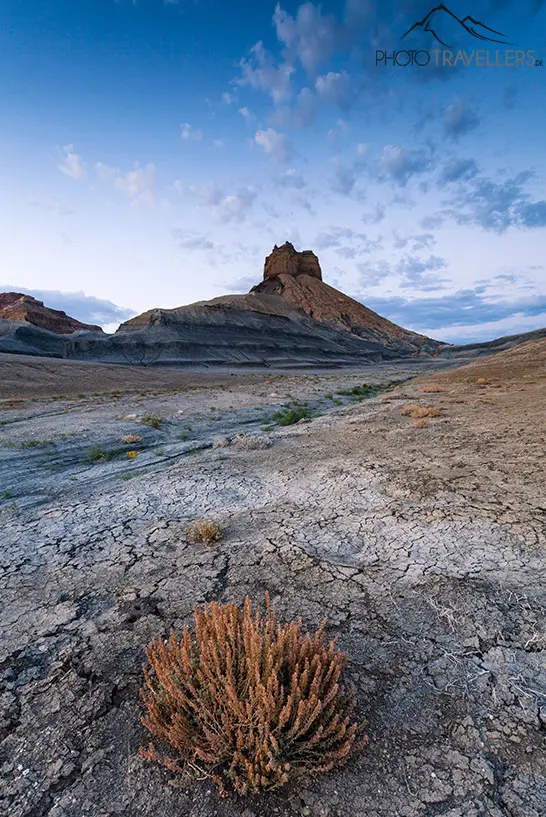
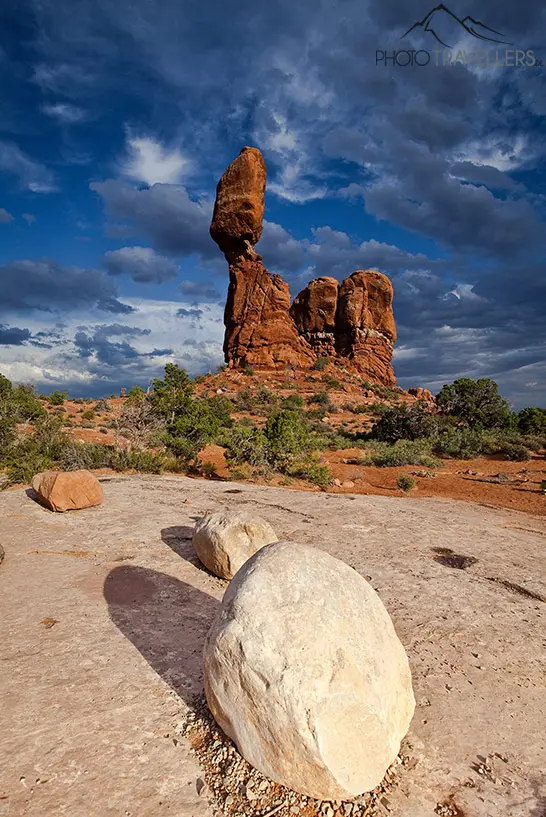
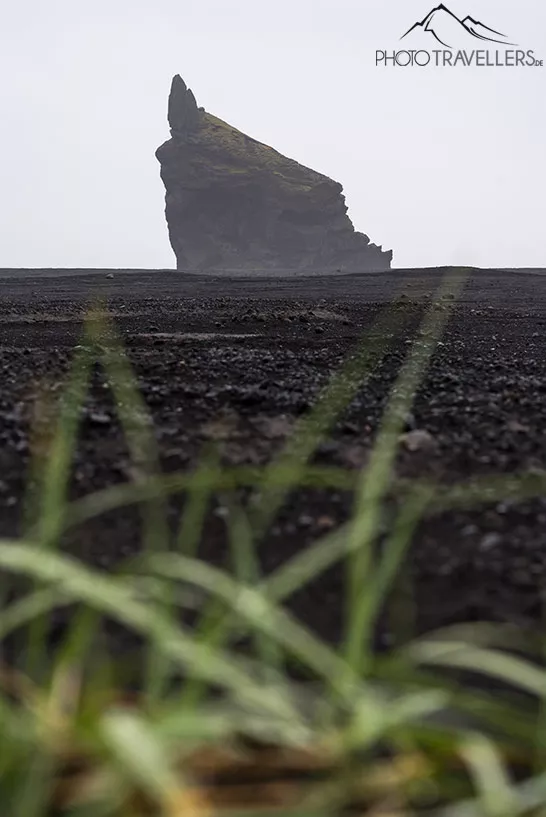
Photos that you take with the ultra-wide-angle lens usually live from a striking foreground, which is sharpened almost to the last centimeter. To achieve this, you need to close the aperture of the lens relatively wide (high f-stop F).
Another exciting option in landscape photography is to deliberately blur the foreground. This works best with a normal focal length or even a (slight) telephoto focal length. The normal focal length corresponds to the field of view of the human eye. On a full-frame camera, that’s strictly speaking 43 millimeters. By normal focal length, I mean the range from 30 to 60 millimeters. Focal lengths above 60 millimeters I call (light) telephoto focal length.
Focus on your main subject in the distance and look for an exciting foreground, which you can approach with the camera up to a few centimeters. Flowers are a good example. The camera can no longer focus on the near foreground with the set focal length. Use this for an exciting landscape photo.

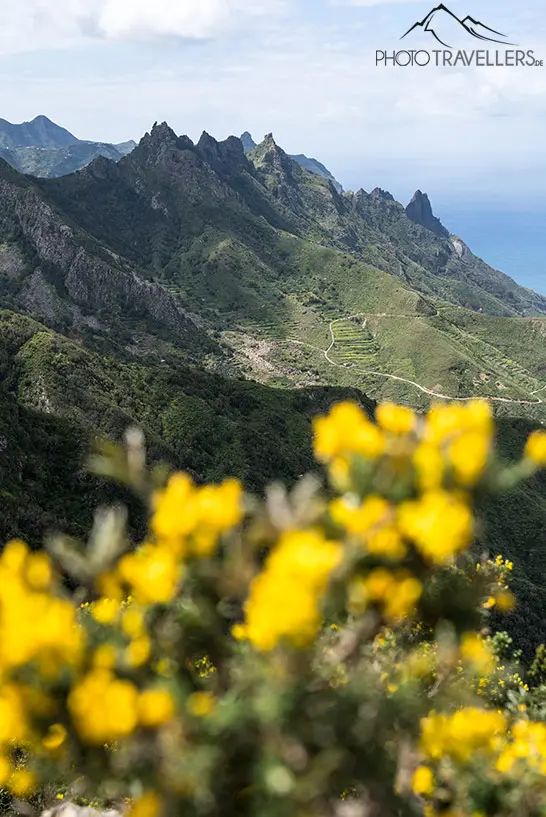
As an alternative to the foreground, you can also blur the background. In this case, you focus on the foreground and get very close to it with the camera. It works similarly if you only want to focus on the middle ground, for example, in order to create tension in your photo.
5. The lines
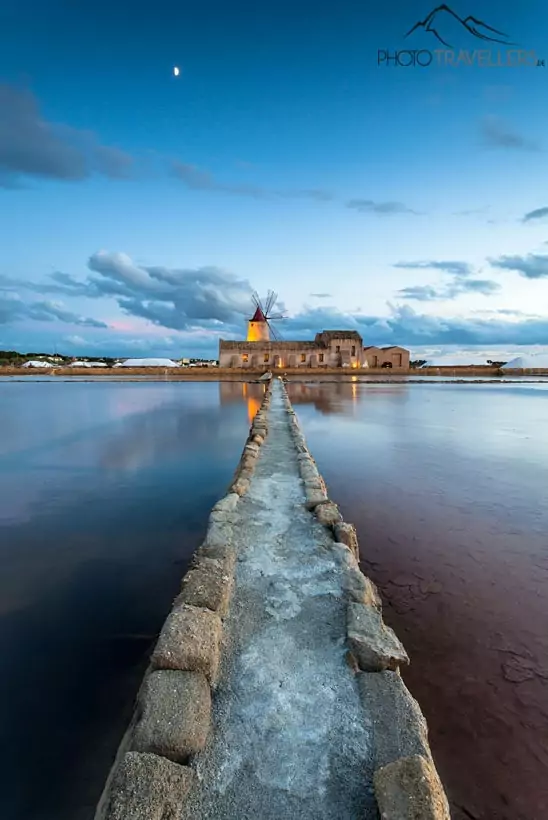
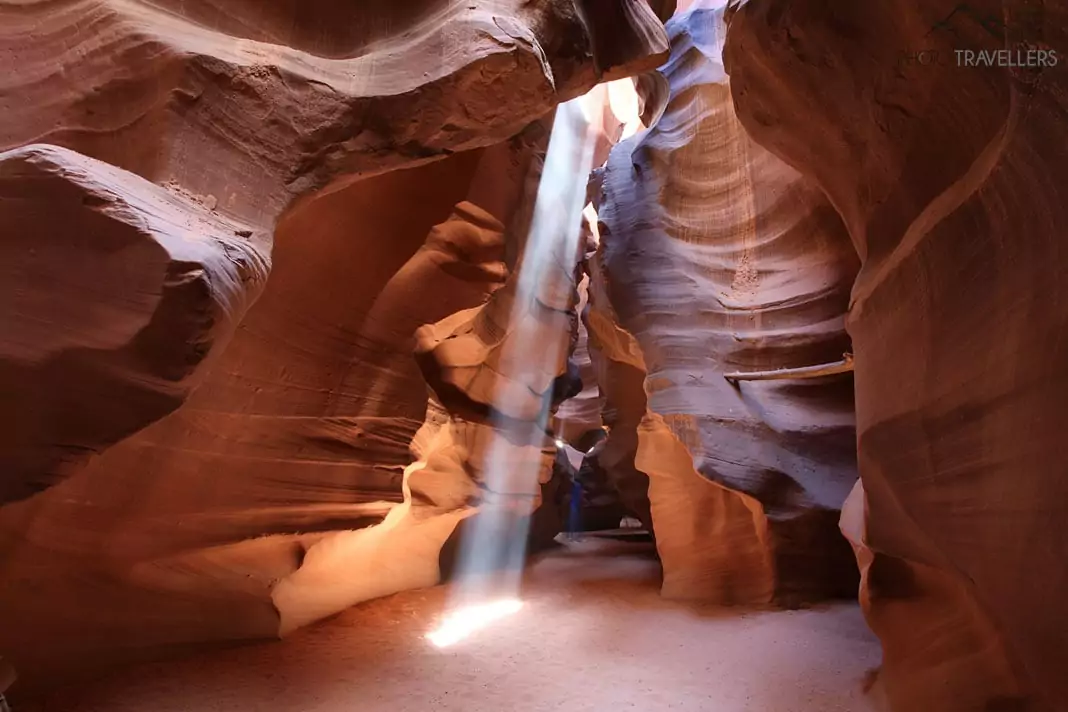
Is there a particularly striking set of lines that draws the viewer into the image? Use lines and make them an essential building block in the composition of the image. A footbridge on a lake, for example, draws the viewer far into the picture. Likewise, there are stone formations that lead into the photo.
Ideally, lines lead the viewer into the image or to the main subject. Horizontal lines stop the view and are usually counterproductive.
Line management is essential in landscape photography. It can turn an ordinary photo into a true masterpiece. So you should take a lot of time for this important aspect.
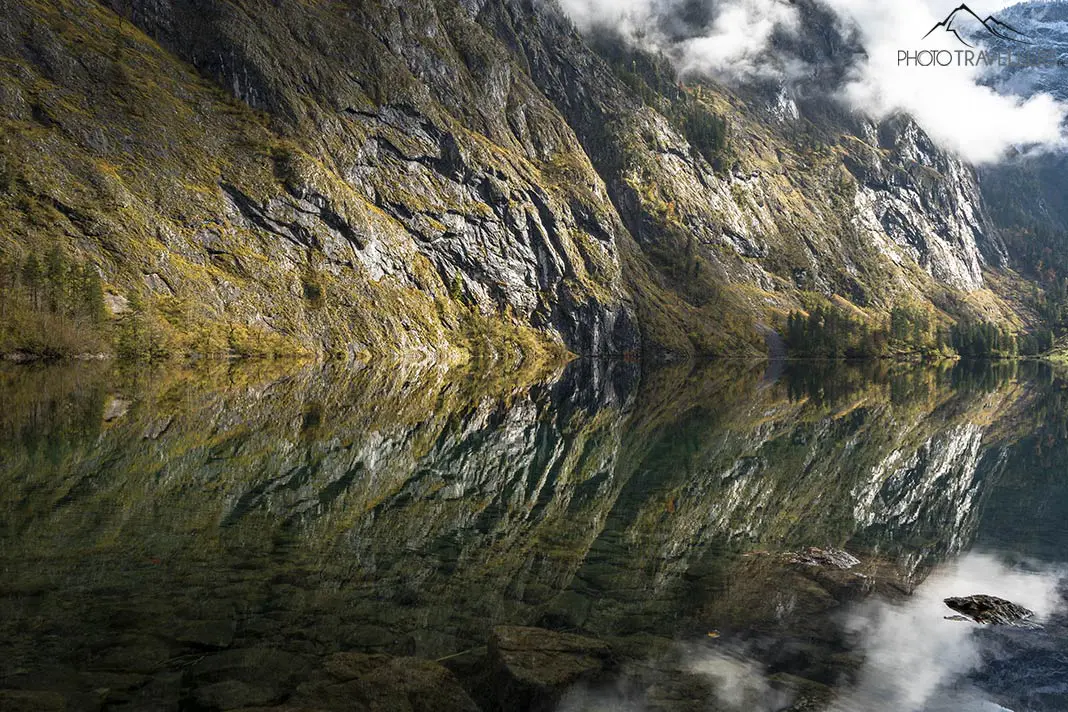
6. Conscious symmetry
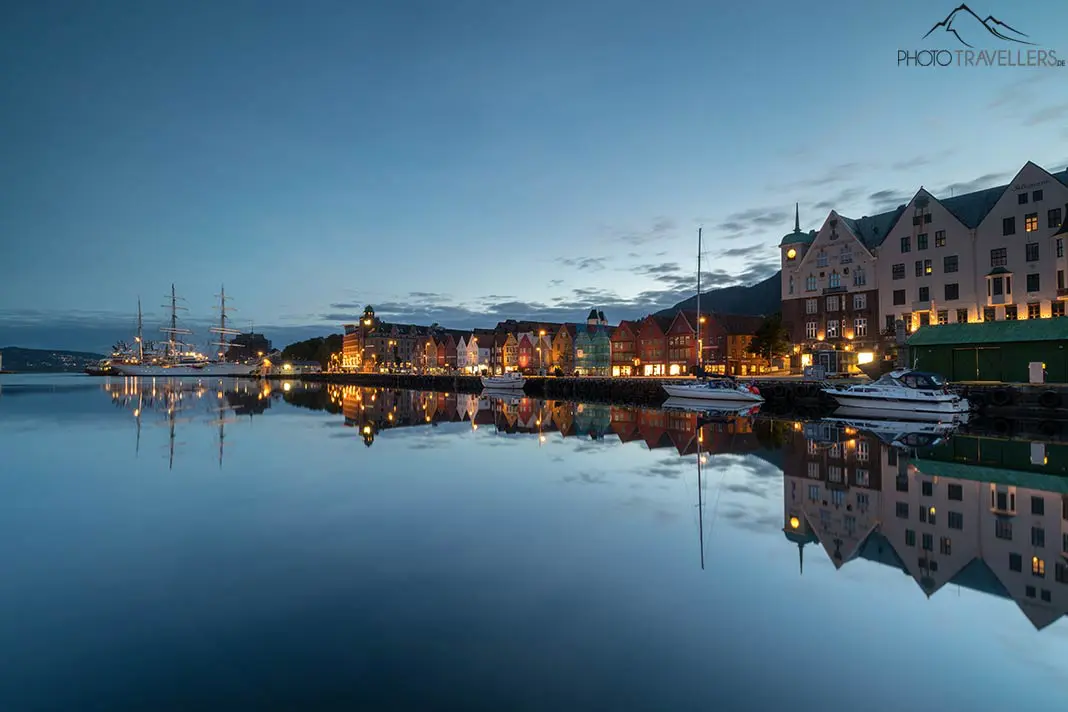
If you are standing by a body of water in which your subject is reflected in the water, for example, it can be quite appealing to make the picture symmetrical, contrary to the rule of thirds.
Or if lines lead to your main subject, you can also place them in the center.
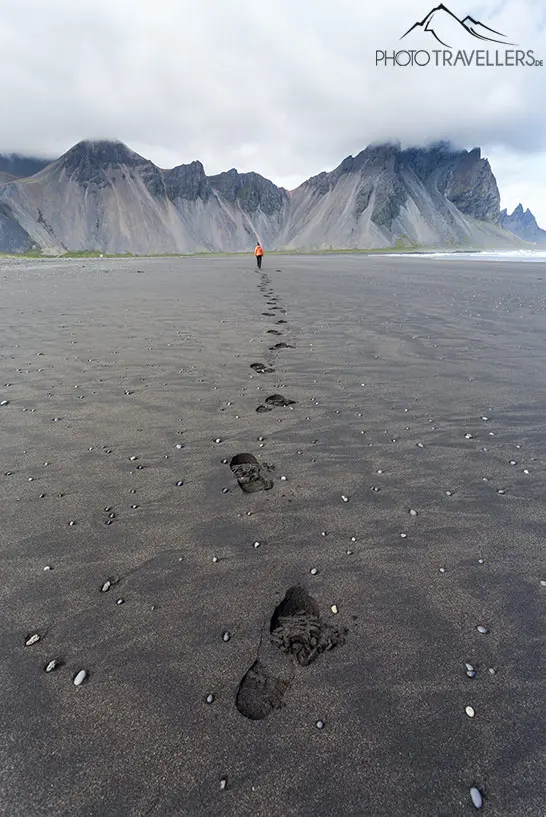
7. Size comparison
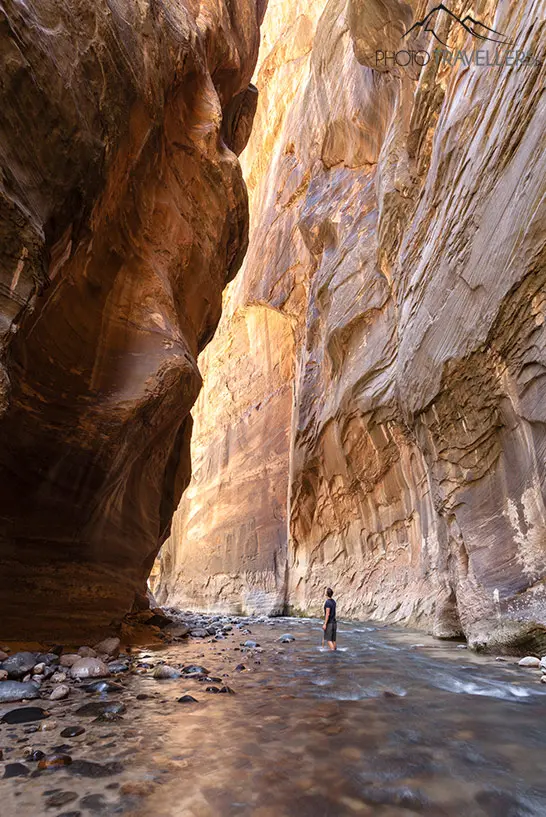
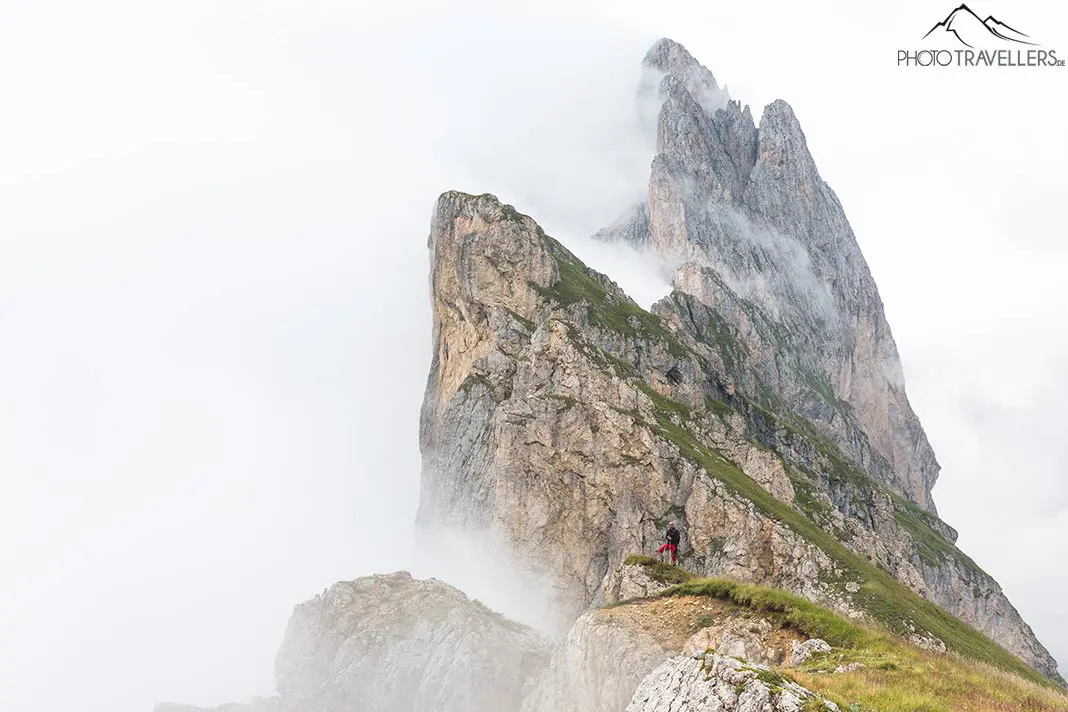
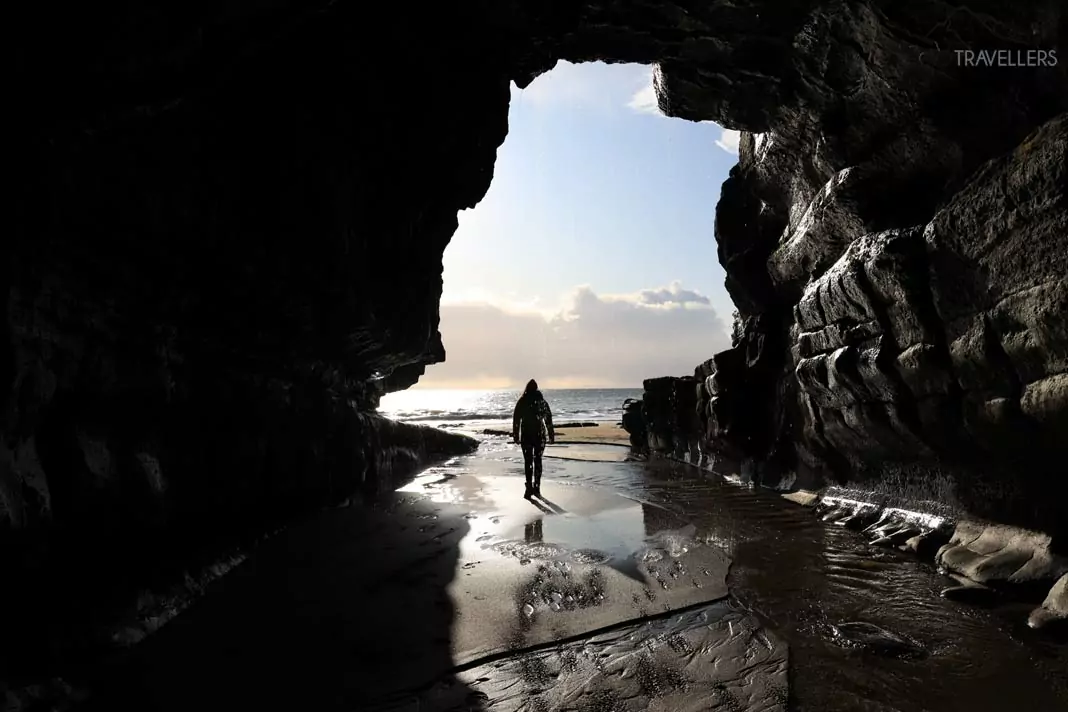
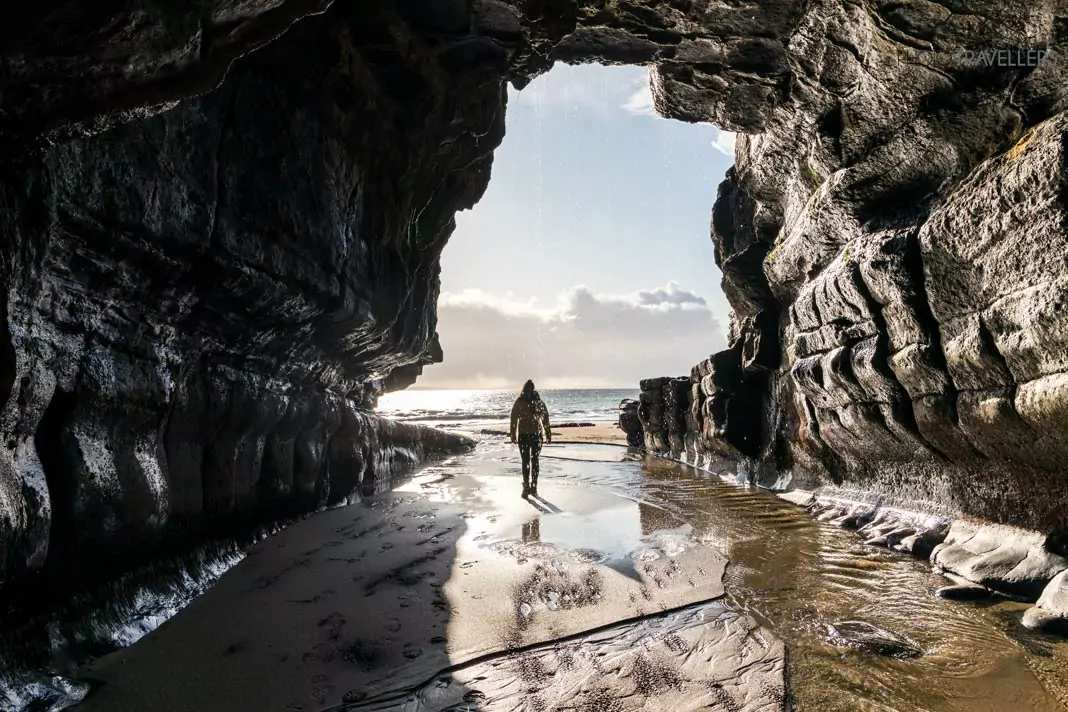
A size comparison with one or more people (or objects to which you have a size reference) also always looks good in landscape photography and creates a real wow effect. A lone hiker in the mountains or a person in a canyon, for example, will give your photo that certain something.
You don’t even have to know the model. Look for people in the landscape that you can use for your purposes in your photo. Of course, you shouldn’t include the person if you don’t know them or have asked for permission.
8. Frame (Framing)
In landscape photography, it’s often a good idea to use a natural frame. This can be trees or a window through which you are looking. Always be on the lookout for such great photo opportunities.
I like to let the frame blur into the blur. This works best with a relatively long focal length. Focus on the main subject and get the camera as close as possible to the natural frame but it should never obscure your main subject.
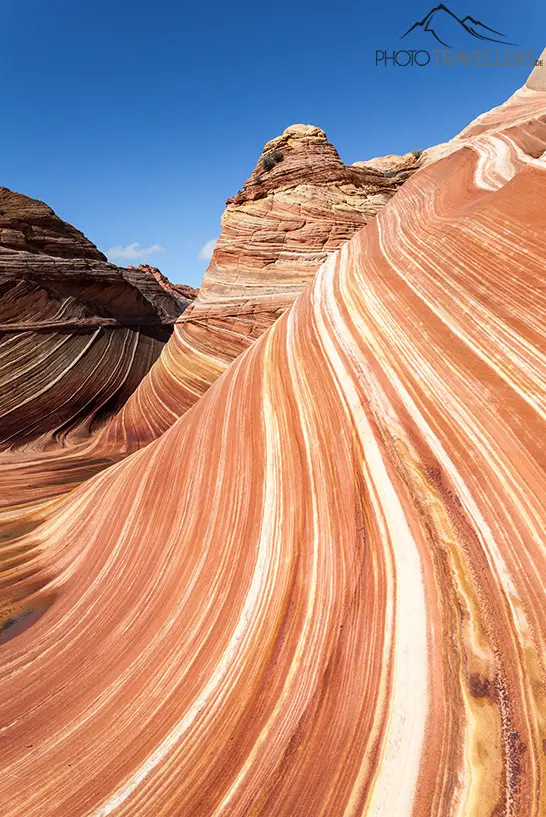
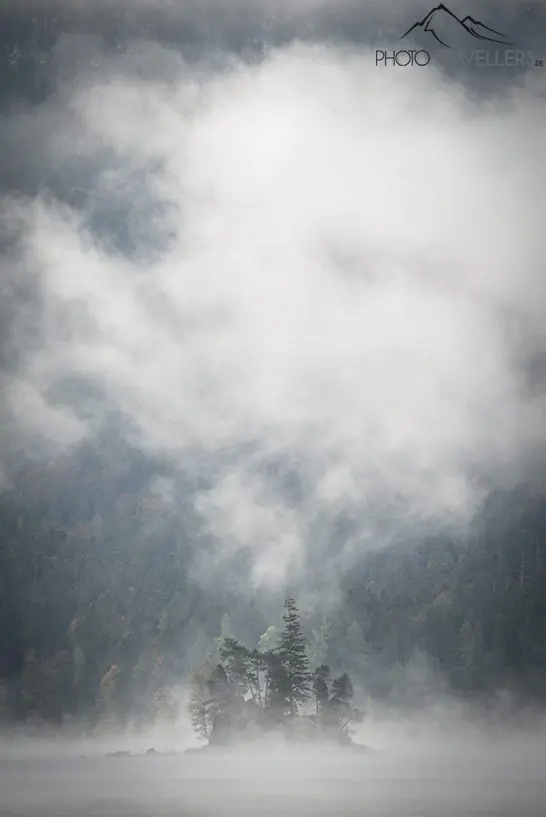
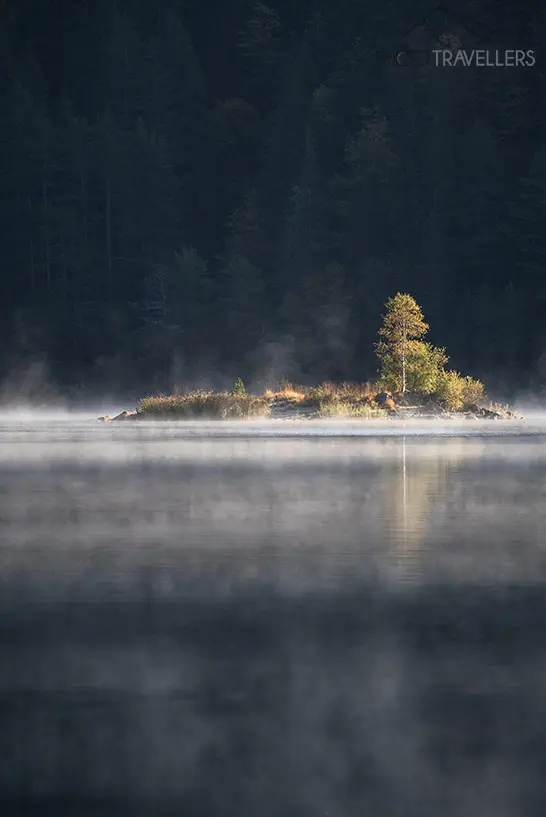
9. Minimalism
Sometimes it can be exciting to capture exactly one subject without any distracting elements in a photo. This can be a tree in the fog or a rock in the sea. This reduction to one motif is called minimalism and requires some practice and a trained eye.
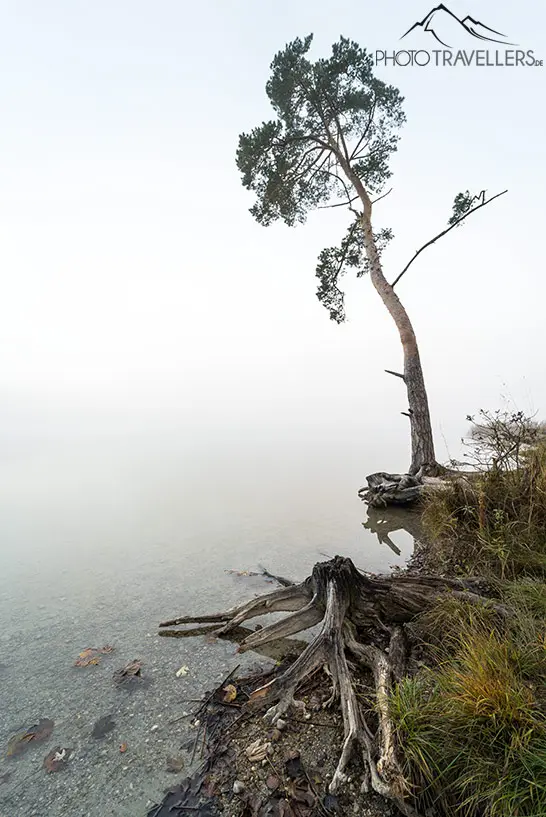
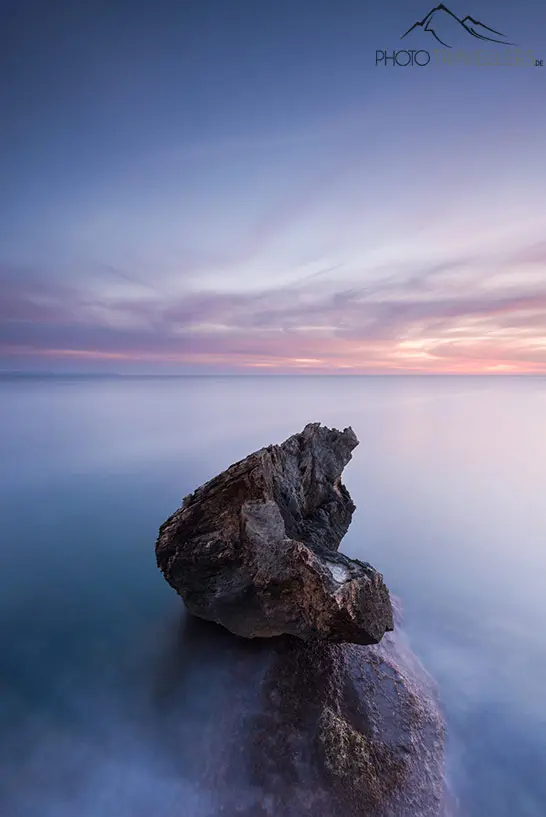
Not every motif is suitable for a minimalist image. Ideally, there should be virtually no other elements in the picture to distract the viewer’s gaze.
Once you have found a motif, try different image compositions. How does the motif look – contrary to the rule of thirds – in the center of the picture? Or does the motif look better in one of the intersections? Try it out!
10. Compression
The compression of a landscape with a telephoto lens is also an exciting stylistic device in landscape photography and, in my opinion, is used by far too few landscape photographers.
Sometimes you see a nice photo subject in the far distance but the foreground (this is where the wide-angle lens would possibly be used again) is anything but photogenic. Try to capture the scene with the telephoto and make it more compact.
Using the telescope visually shortens the distances between individual elements. This also creates breathtaking landscape images.
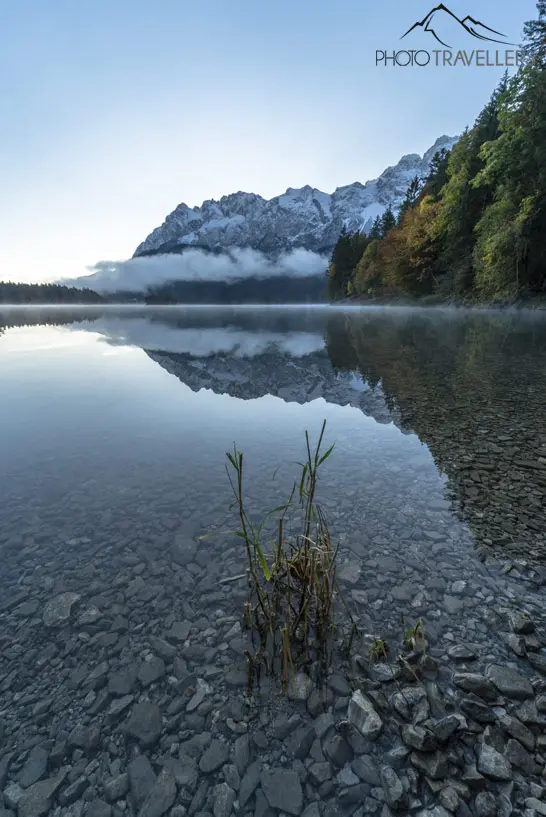
The best light for magnificent landscape images
The composition of the image is one thing, the right light is another. At midday, you will only succeed in taking great landscape pictures in a few cases. Be out and about with your camera in the morning and evening – that’s the basis for really cool landscape pictures.
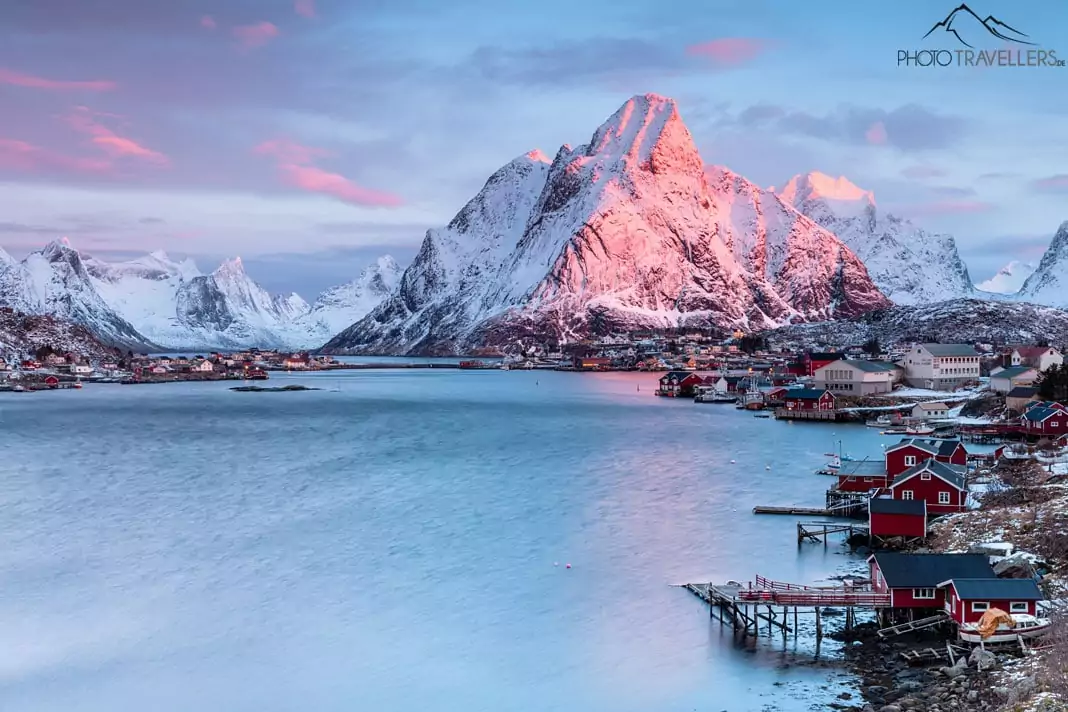
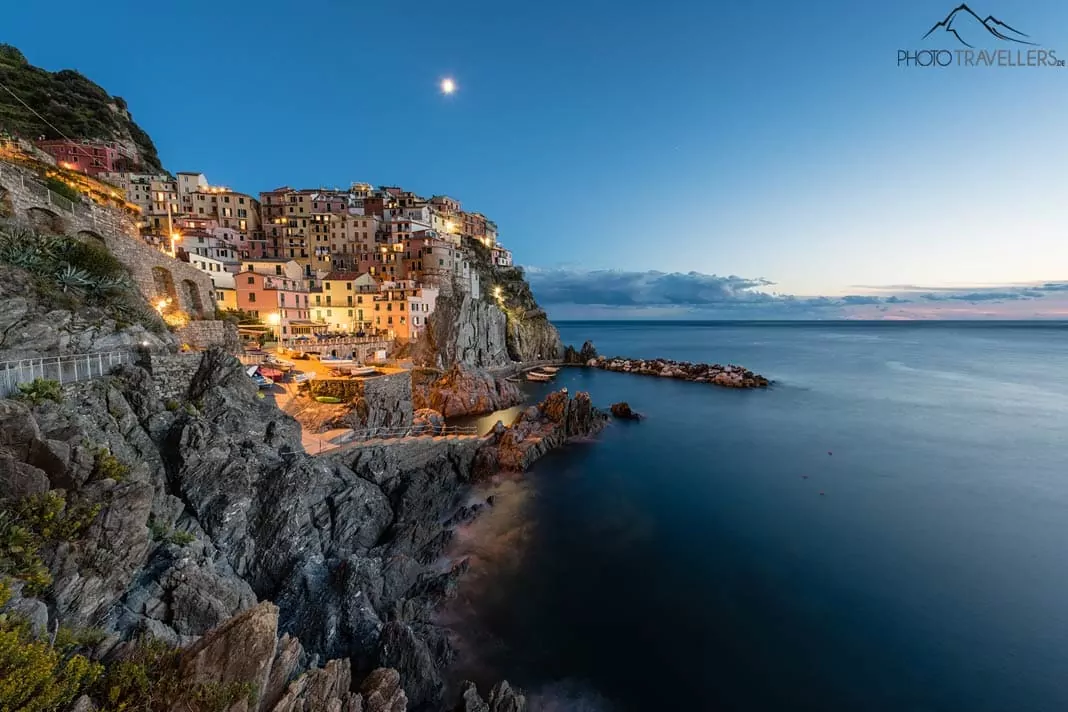
11. Use golden and blue hour for breathtaking landscape shots
The most beautiful landscape photos are taken at golden hours. During the golden hour, i.e. the period shortly after sunrise or shortly before sunset, the sun casts long shadows and really bathes the landscape in golden light – hence the name “golden hour”. The colors are intense and the shadows give your pictures something mystical.

Equally spectacular landscape photos are taken during the blue hour, the time just before sunrise or just after sunset. The sky glows in an intense shade of blue and the long exposure times make the colors extremely intense.
Direct light, for example at midday, is very harsh – your photos lose brilliance and color. An exception are sea pictures, for example in the Caribbean. The water shines very intensely, especially at midday.
I like to shoot against the sunrise or sunset, so I have backlight in the morning or evening. With a few clouds in the sky, however, this is no problem for the camera (if you implement our technique tips from above).
But backlight is also wonderful. When the sun is low and the landscape in front of you is illuminated from behind. You have to be careful with your shadow and the shadow of the camera (on the tripod) – you don’t want them in the picture. Sometimes it helps to crouch behind a rock – or “crop” the direct foreground with a longer focal length.
Stray light is light that comes in from the side – and of course that also offers great photo opportunities.
The most beautiful landscape photos are often taken at golden hour but blue hour also offers wonderful photo opportunities.
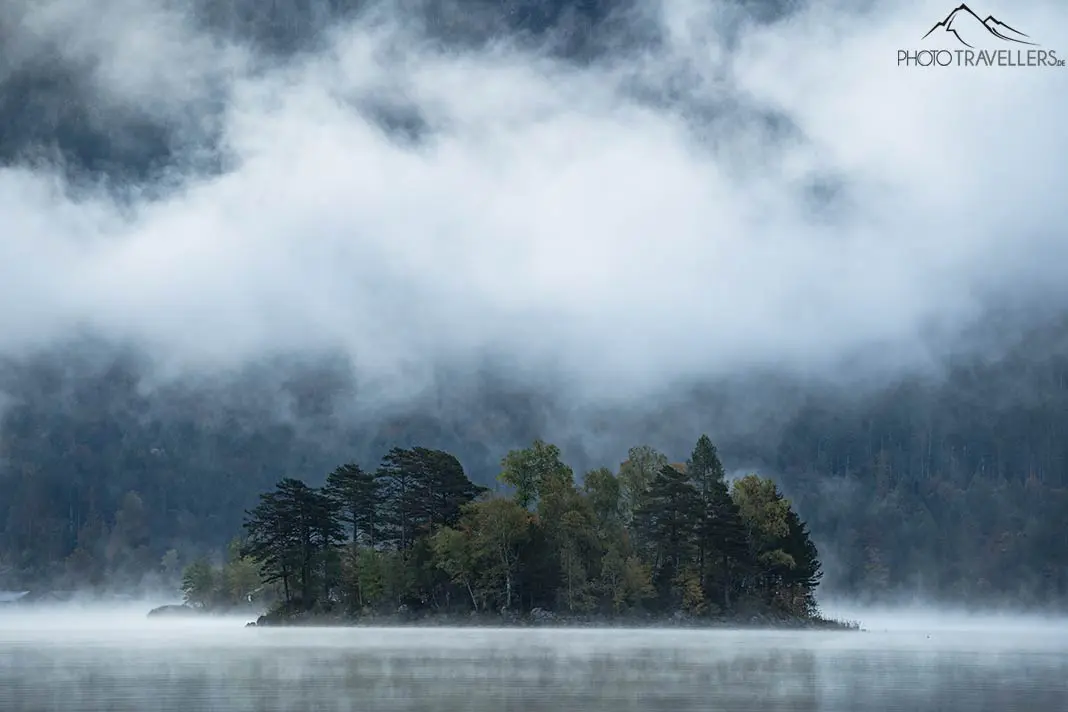
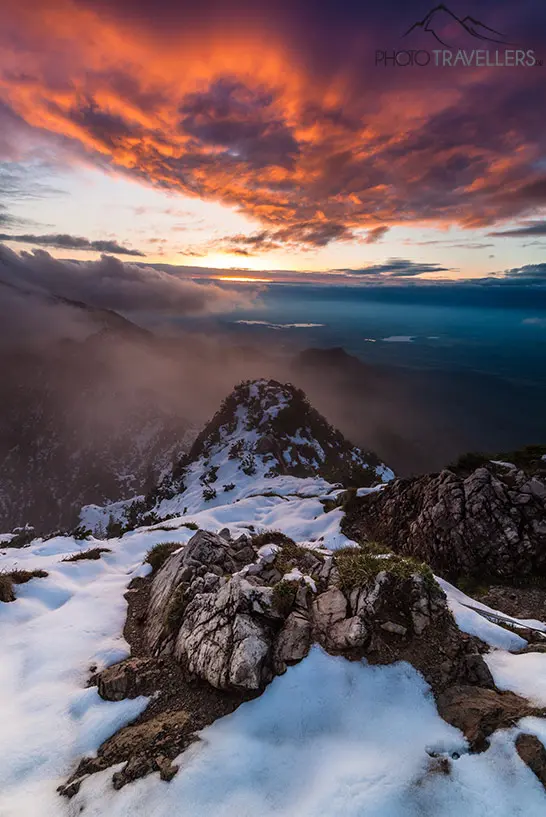
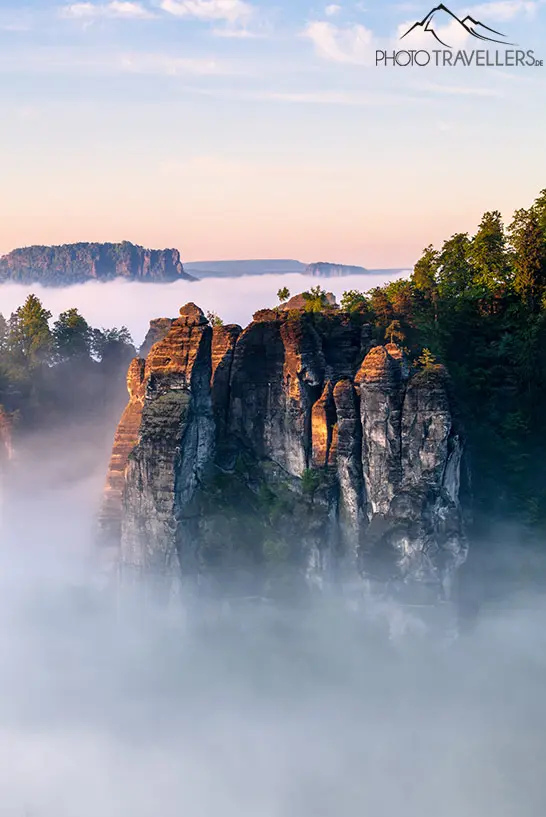
12. Clouds and fog make your pictures dramatic
A cloudless sky is perfect for a beach vacation. But if you want to take breathtaking landscape pictures, you need clouds in the sky. Clouds add an interesting texture to the otherwise rather boring blue expanse and also serve as a diffuser for the sunlight during the golden hour.
With clouds in the sky, you will also succeed in taking the best backlight shots. In addition, clouds moving across the sky are excellent for long exposures.
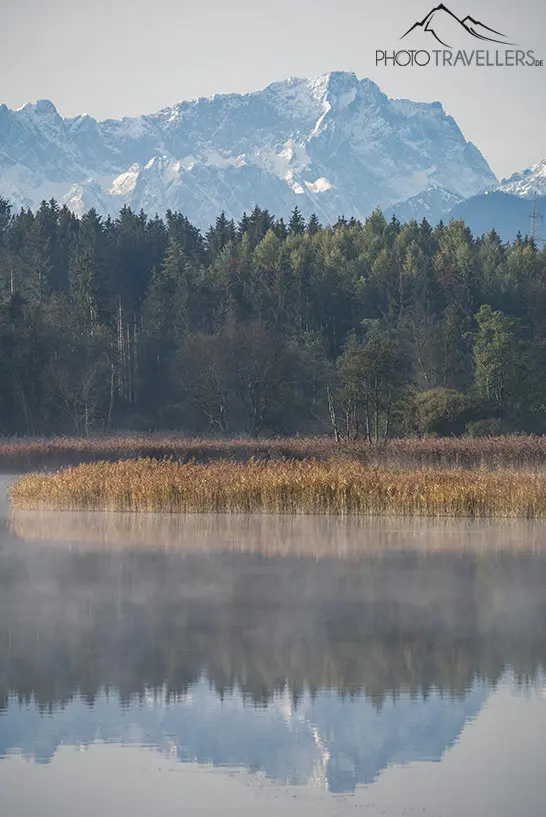
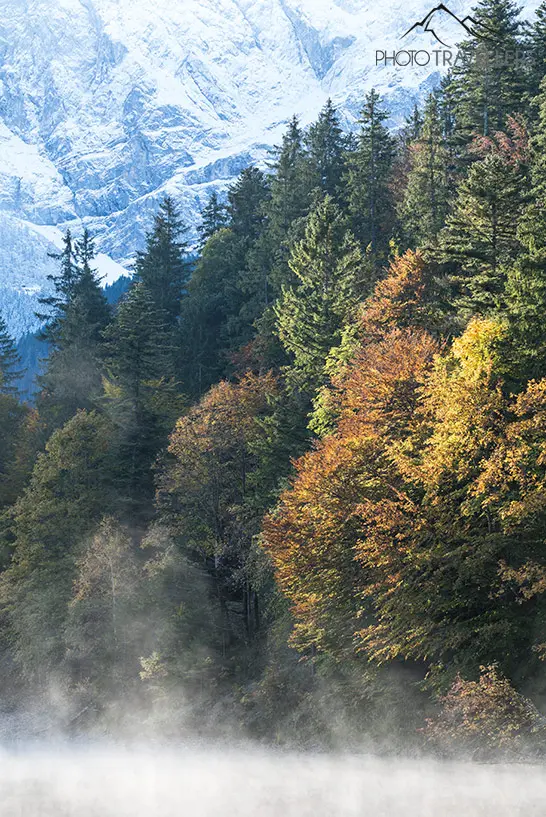
You will succeed in taking very beautiful landscape photos, especially in autumn. Besides the colorful trees, the morning fog makes your pictures unique.
The perfect camera equipment for landscape photographers
Here I tell you which photo equipment you should ideally have with you as a landscape photographer. But don’t worry: Even if you can’t afford a camera costing thousands of euros, great photos can also be taken with a smartphone if you get to grips with the composition of the image and take photos at the right time.
13. The right camera for landscape photography
Which camera is the best for great landscape pictures? “Is a simple beginner camera enough or do I need to buy an expensive professional camera right away?” – I hear questions like these all the time on my photography courses in the Bavarian Alps.
You can rest assured: You definitely don’t need a sinfully expensive camera to shoot beautiful landscape photos. Even with your smartphone, you can take great shots if you follow a few simple rules.
It also doesn’t matter whether you use a system camera (DSLM) or a single-lens reflex camera (DSLR) with a full-frame sensor, APS-C sensor or another sensor size to take photos.
Here we explain the difference between DSLM and DSLR and tell you all the pros and cons of the two camera systems. Whether you’re using a DSLM or DSLR, an entry-level or professional camera, our tips will help you take great photos with any camera.
If you are on the road with a mirrorless system camera, you will get more dust on the sensor when you change lenses frequently (which I partly curse!). This problem of every landscape photographer has so far only been solved by Canon with their R-models.
By the way, we ourselves are currently on the road with a Sony Alpha 7 III and a whole armada of lenses for all situations. For demanding mountain tours we also have a super light Canon EOS M50. Here you can find our camera equipment with all camera bodies, lenses and accessories.
14. The right lenses for landscape photography
The ultra-wide angle lens
In landscape photography, an ultra-wide angle lens becomes a necessity. On a full-frame camera (such as the Sony Alpha 7 III), 12 mm to 16 mm focal lengths are ideal. There are even full-frame lenses with even more wide-angle, such as the Laowa 10-18 mm. This allows landscape images with an extreme angle of view.
On a camera with an APS-C sensor like the Sony Alpha 5000, the Sony Alpha 6000, or the Canon EOS M50, this corresponds to a focal length of about 8 mm to 11 mm due to the so-called “crop factor” of 1.5 or 1.6.
The telephoto lens
In addition to the ultra-wide-angle lens, a telephoto lens should also be included in your camera backpack. With the telephoto lens you can capture subjects that are far away. It also brings the subjects very close together, which enables great effects. There are regions in the world where you would be lost without a telephoto lens, such as Tuscany or Scotland.
The standard zoom
In landscape photography, however, you will always have subjects in front of your lens where a standard zoom (24-70 mm focal length full-frame; 16-50 mm APS-C) works best.
Lenses for landscape photography at a glance
- Ultra wide-angle lens
- Standard zoom
- Telephoto lens
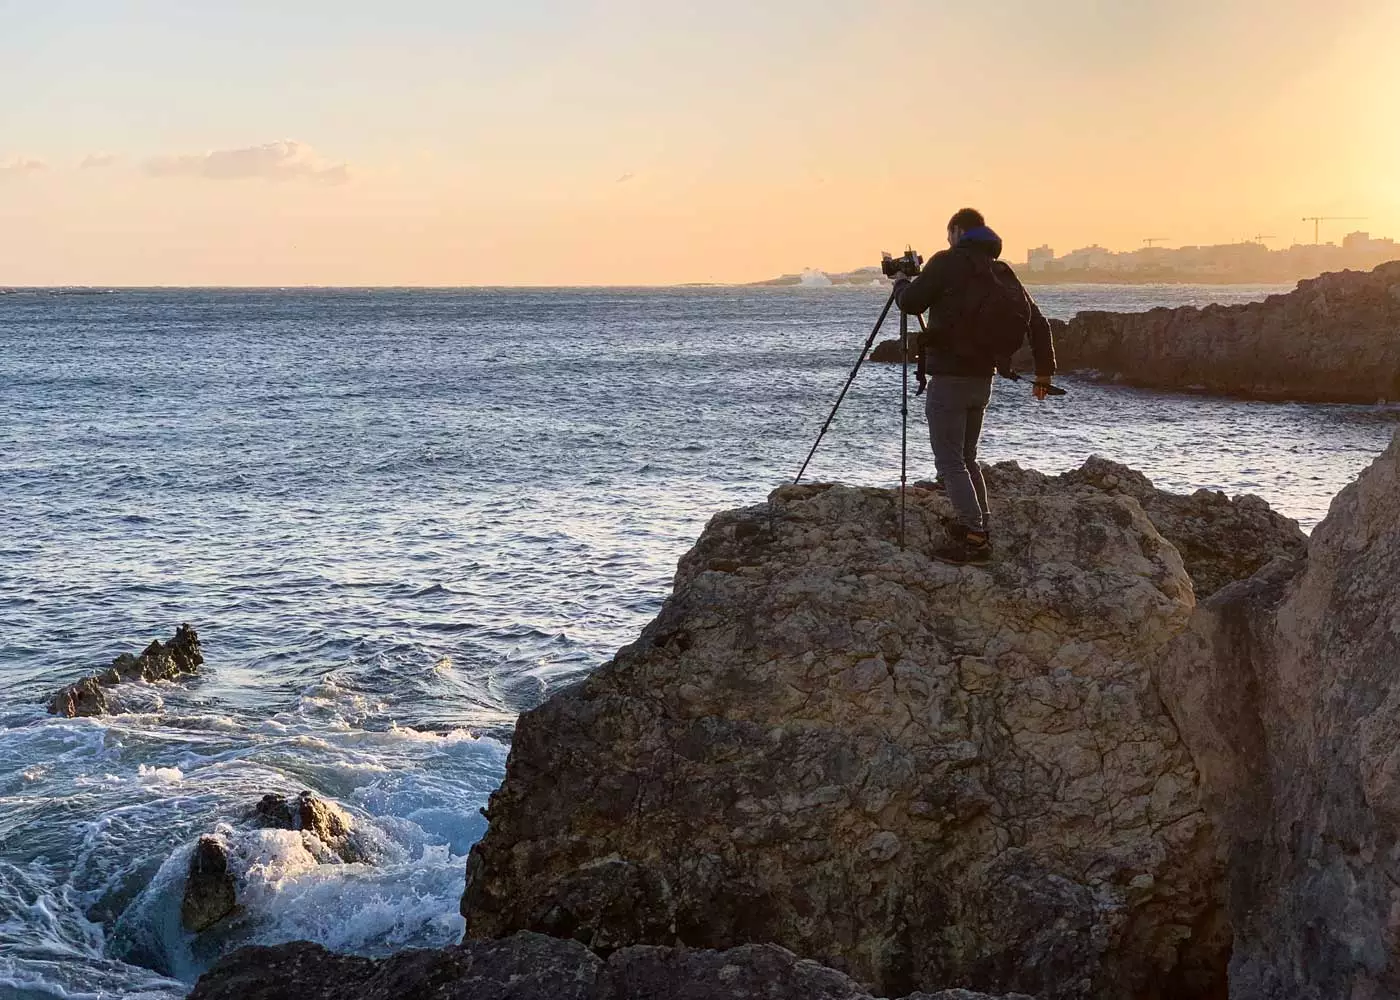
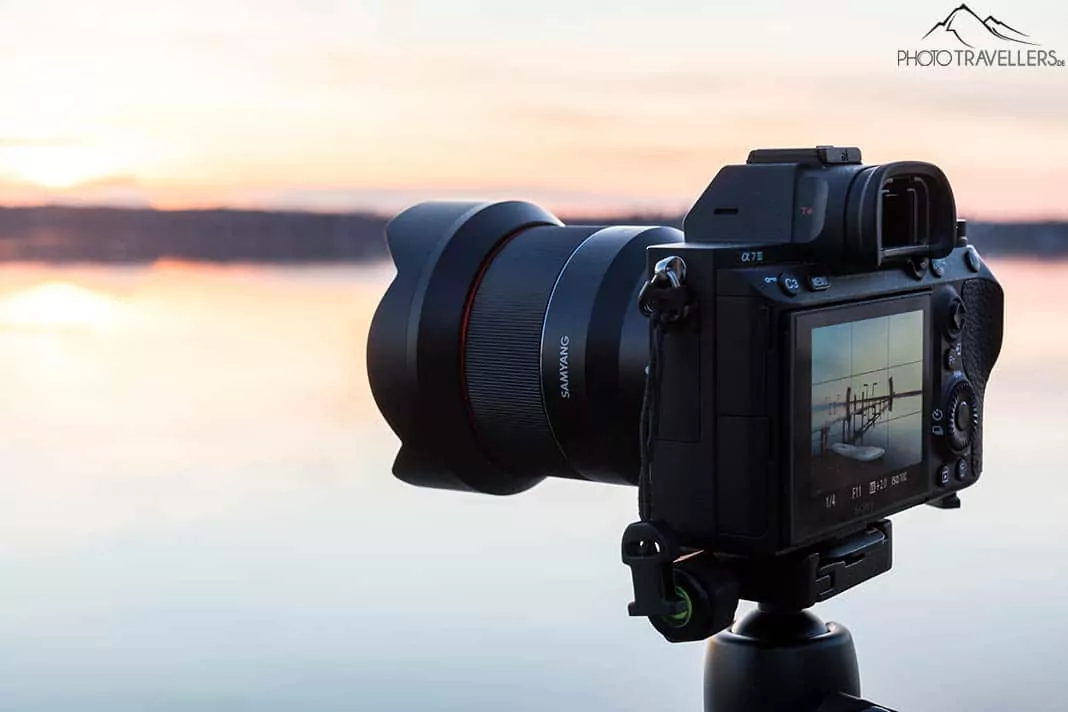
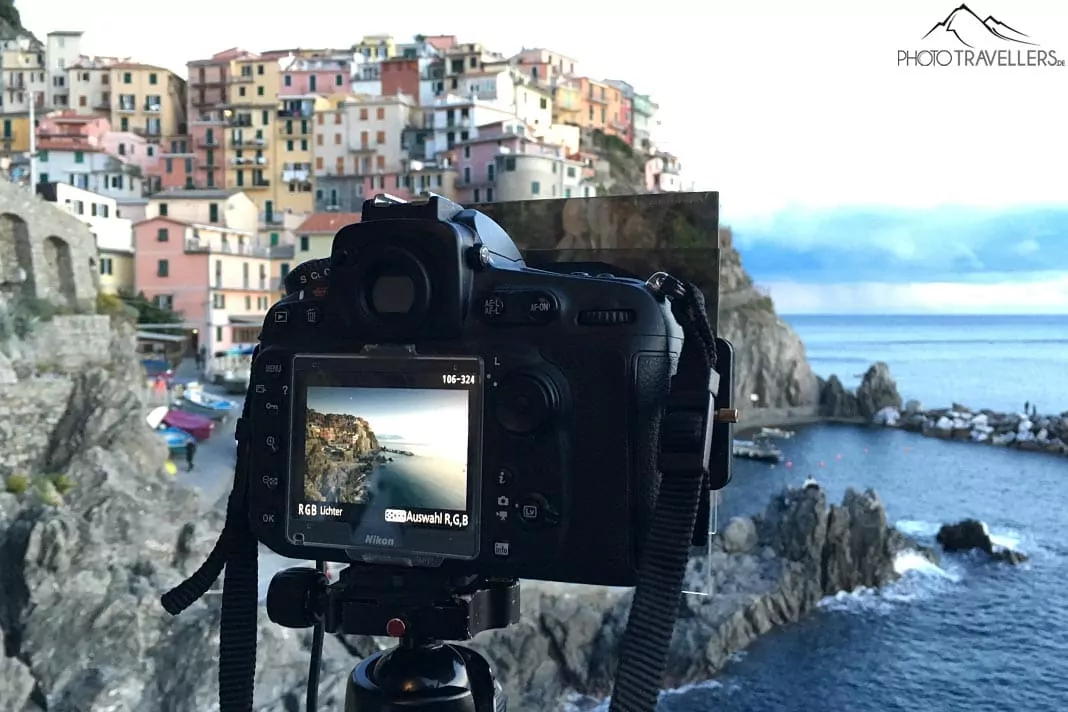
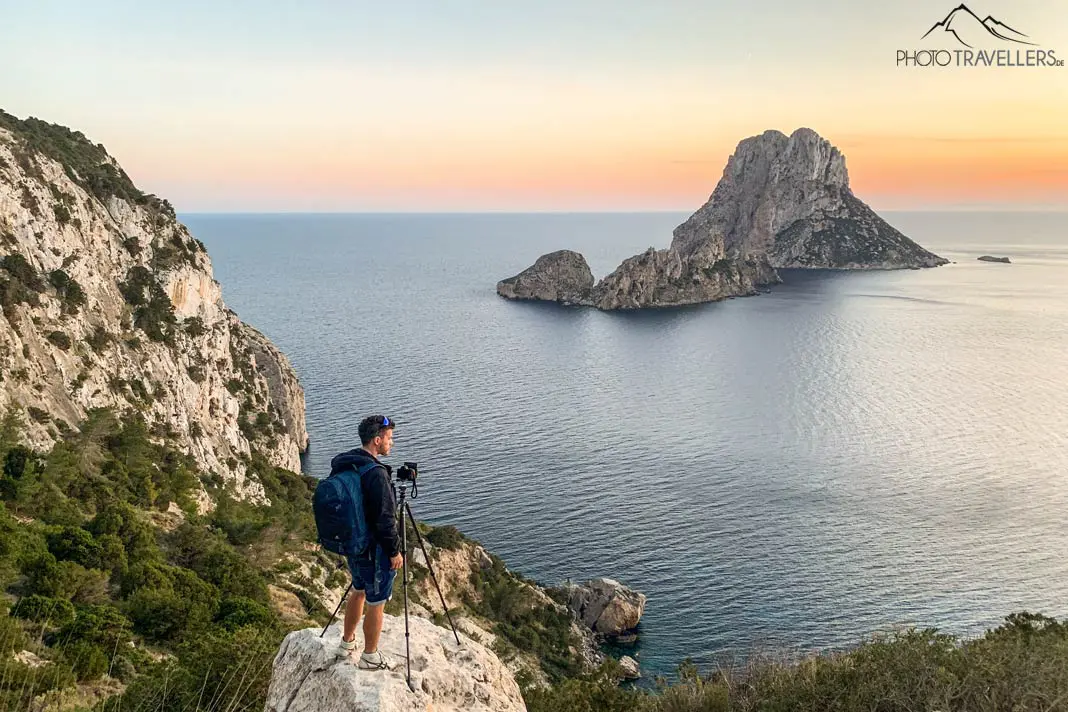
15. The tripod
A good tripod is a must-have in landscape photography. I see photographers all the time who are out and about without a tripod – even at dusk. Sure, a tripod is heavy and sometimes a bit cumbersome – but in landscape photography, it is often essential.
With a tripod, you can expose as long as you need to – regardless of the lighting conditions. You can also be much more deliberate about the composition of your image. If you’re looking for a sturdy and extremely lightweight tripod, check out the Gitzo Traveler 1545T (check price here*).
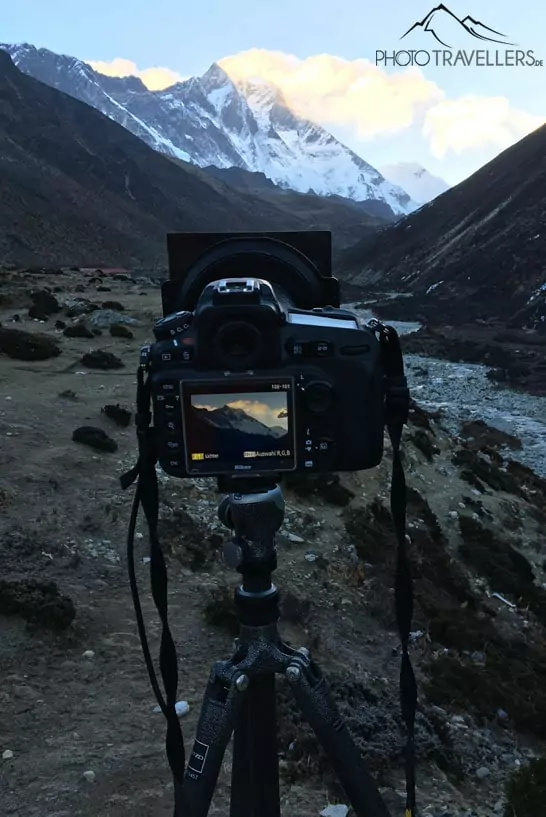
With the tripod and the integrated spirit level you can straighten the horizon perfectly. There is no need for later correction and the inevitable cropping of the photo that comes with it. A remote shutter release prevents blurry photos by pressing the shutter button.
Also, with the remote shutter release, you can use the “bulb mode” to expose for longer than 30 seconds without pressing the shutter button. Without a remote shutter release, the photo may blur despite the tripod. The alternative is a camera app on your smartphone if your DSLM or DSLR supports it.
Modern cameras such as the Canon EOS R5, the Nikon Z5, and Z6 or Sony’s 7 and 9 series have a built-in image stabilizer (always deactivate it on the tripod). This makes it possible to achieve handheld exposure times of up to two seconds – with only a slight loss of sharpness. However, the best results are still achieved with a tripod.
16. Filters in landscape photography
Gray filter
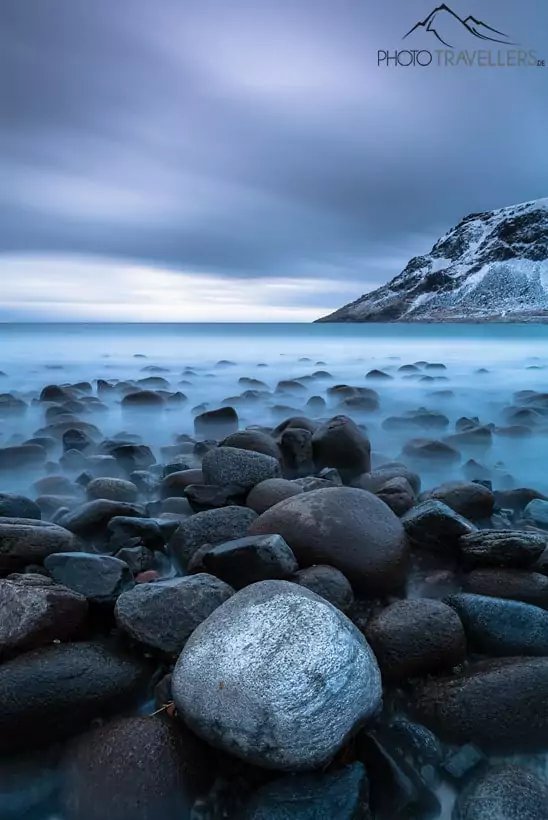
With a gray filter you extend the exposure time. Blurred clouds or water that appears like fog are the effects. There are different filter strengths.
A light gray filter (which darkens only one aperture) doubles your exposure time. With a strong gray filter, you can even expose for a few seconds or even minutes during the day. A gray filter with 10 f-stops extends the exposure time by a factor of 1000. Here, for example, an exposure time of 1/60 second becomes an exposure time of 15 seconds.
Polarizing filter
A polarizing filter is used to reduce reflections on water (generally on “non-metallic surfaces”). Be careful with the polarizing filter on wide-angle lenses: Here, the polarizing effect does not extend across the entire image – resulting in unsightly spots in the sky.

Graduated gray filter
With a graduated gray filter you can handle even the most difficult light situations. Often the sky is too bright compared to the foreground, especially in backlit shots. The gray graduated filter helps you to get the high contrast under control.
Modern camera sensors are characterized by a high dynamic range. Often you don’t need a gray graduated filter anymore.
Nevertheless, there are always situations that will bring even the best image sensors to their limits. In addition, the graduated gray filter also acts like a gray filter: it increases the exposure time. Often, the gray graduated filter replaces the gray filter when you need only a slightly longer exposure time.

An alternative to the gray graduated filter is the HDRI (High Dynamic Range Image) or HDR image. Here, you create multiple exposures and later compute them into one photo using the software.
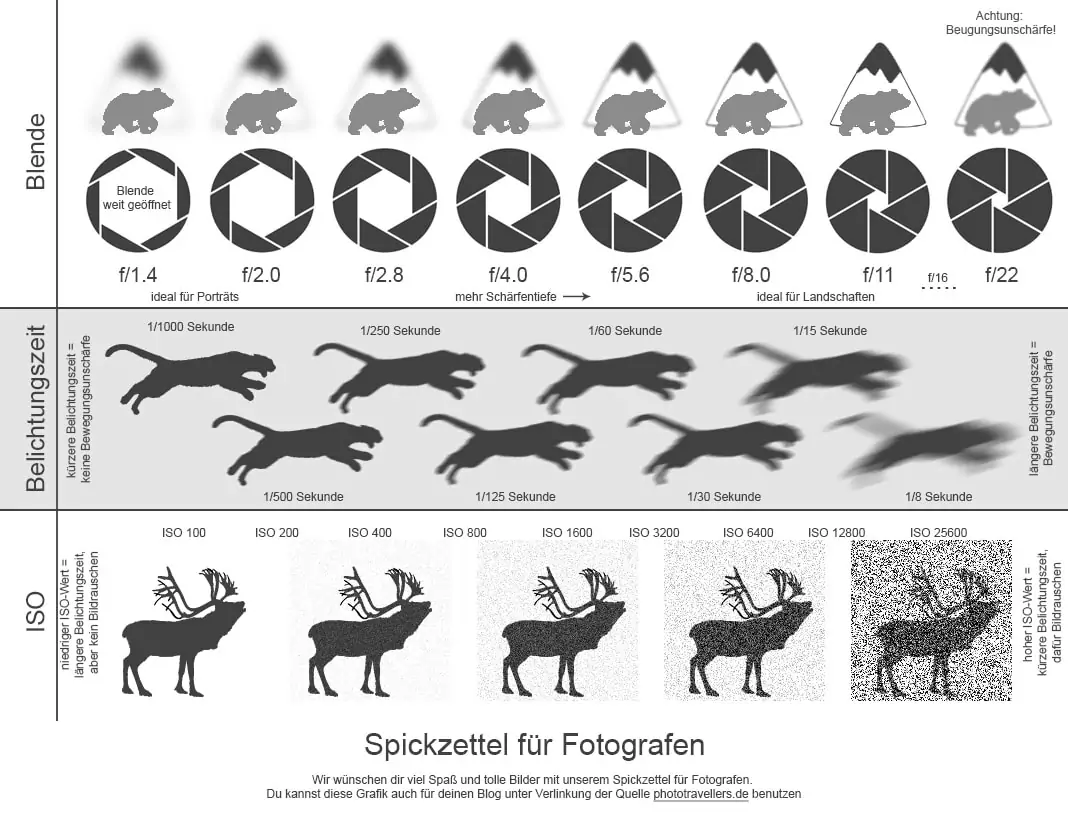
The correct camera settings for beautiful landscape photos
Here I tell you the right camera settings. If you choose the correct aperture, exposure time, and ISO, this is the basis for beautiful landscape pictures.
17. Manual mode (M)
If you are using a tripod, you should forget about the automatic mode of your camera! After all, the cam doesn’t “know” what effect you want to achieve. Do you want to shoot the surf at the sea like fog or should the water remain dynamic? My tip: Always use the manual mode on the tripod. This is the only way to get photos that are exactly what you want.
During the day, in simple light situations without a tripod, I usually use aperture priority (A or AV). Here you specify the aperture (about f/8 for handheld photos). It’s not for nothing that there’s a photography adage: “When the sun is shining, use f/8.”
In aperture priority mode, the camera automatically sets the right exposure time and ISO value (make sure to activate the ISO automatic) for you. You can now concentrate fully on the composition of the image.
Use the manual mode on the tripod. During the day – for example on hikes – you can usually set the aperture priority (A, AV) with the ISO automatic.
18. The right aperture for landscape photography
Landscape photos should usually be sharp from front to back. To achieve this, you should close the aperture relatively wide. Aperture values between 8 and 13 work best.
On the tripod, I usually work with f/11 or f/13. Thanks to the relatively wide closed aperture, you achieve a large depth of field – so (almost) everything is sharp from front to back.
F/11 or f/13 are ideal in many situations in landscape photography. Good to know: Small image sensors have an advantage when it comes to great depth of field (and disadvantages when it comes to cropping objects). That’s why smartphone images, for example, are consistently sharp from the very front.
But be careful: If you close the aperture much further (such as f/22), this leads to the dreaded diffraction blur. This occurs when the aperture is closed too far. Depending on the camera sensor, this effect occurs to varying degrees.
Large image sensors (full format) with a low resolution (megapixel number) have an advantage. In an APS-C camera with a high megapixel number, diffraction blur occurs earlier and more strongly than in a full-frame camera with a low megapixel number.
On my Sony Alpha 7 III, for example (full-frame with “only” 24 megapixels), I can set f/18 without any problems. With the aperture wide closed, I bring the sharpness a few centimeters further forward. However, this is only relevant for landscape photos with the ultra-wide-angle lens.
19. The ISO value
Beginners often make the mistake of working with high ISO values. There is usually no reason for this in landscape photography. If you work with a tripod, you should set the ISO value as low as possible. This is usually ISO 64, ISO 100 or – for cameras with a small image sensor – ISO 200.
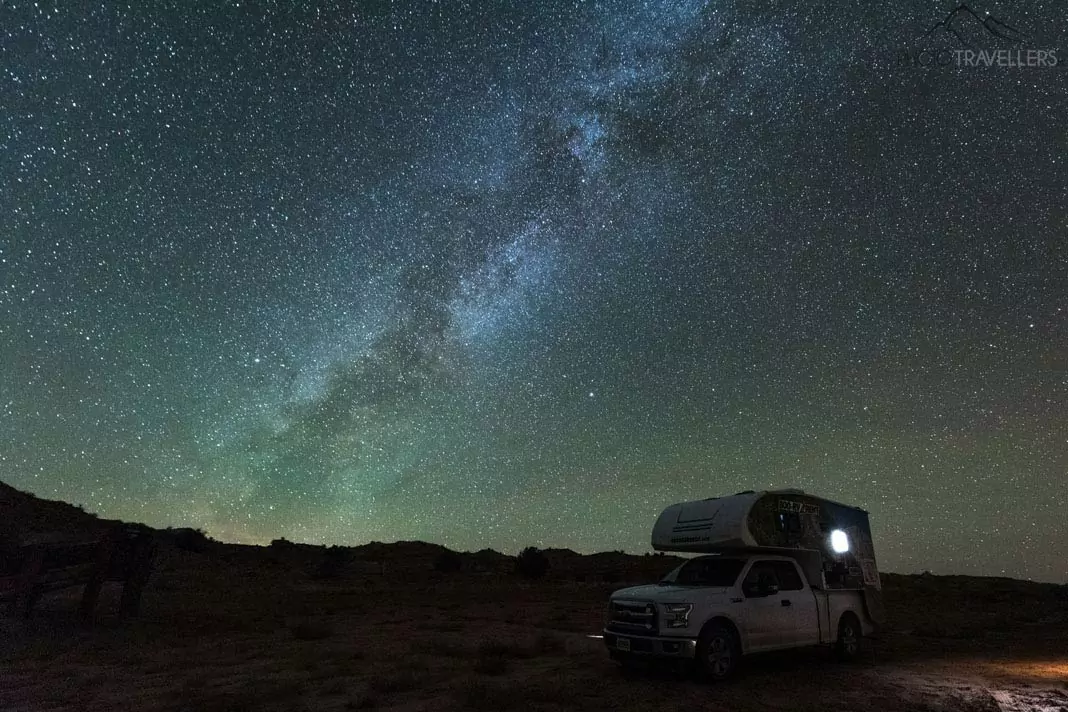
For night shots with the starry sky, on the other hand, you usually have to turn the ISO value well into the four-digit range. The reason is simple: if you expose your star image for too long, the stars will no longer be point-like.
ISO 100 is usually the ideal ISO value for landscape photography. For star images, however, you have to increase the ISO value significantly.
20. The exposure time
The exposure time is calculated from the available light, the set aperture and the set ISO value. In manual mode, the exposure scale of the camera or the histogram help to determine the correct exposure time.
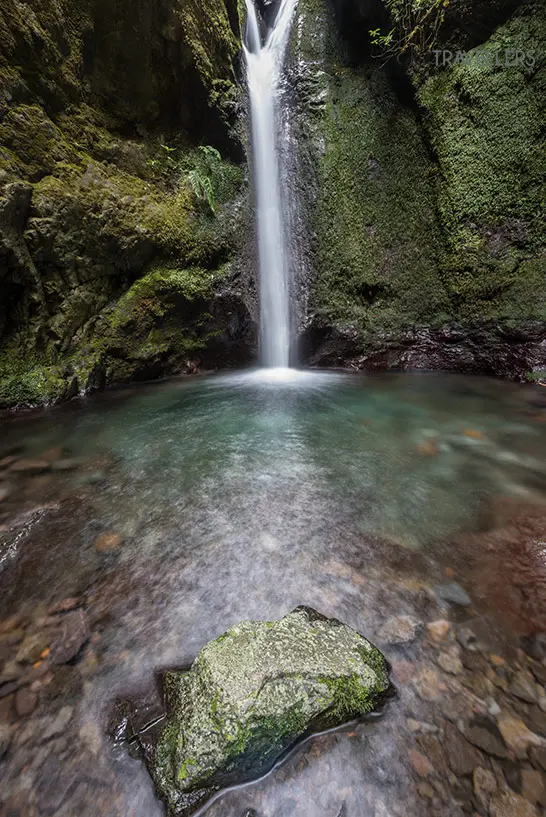
There is no perfect exposure time. If you work with a tripod, you can expose for several minutes or even hours – if you like.
In twilight, the exposure time is often already a few seconds. In landscape photos, where there is no movement, it is usually irrelevant whether you expose for two, five, or 30 seconds.
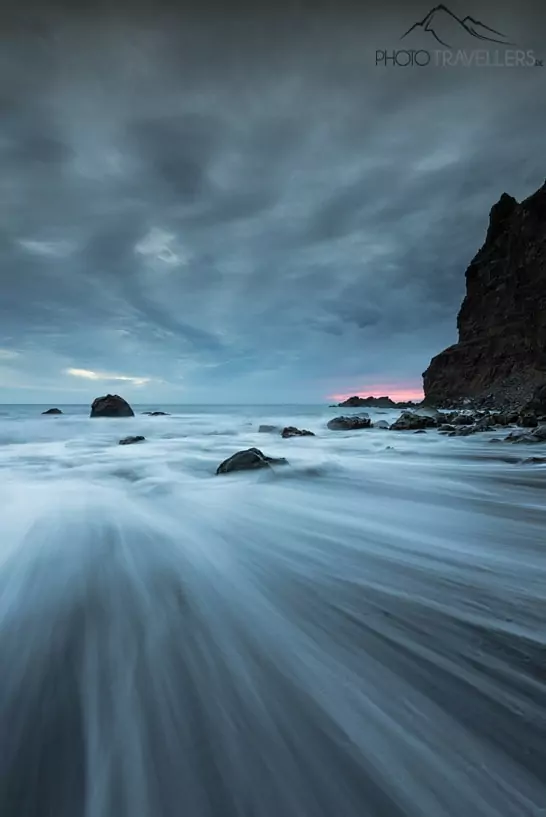
At the seaside, for example, where the water is moving, the exposure time plays a much greater role. With exposure times of less than one second, you capture the dynamics of the water. Exposures of several seconds or minutes, on the other hand, make the water look soft, like fog.
For long exposures during the day or of several seconds or minutes, it is best to use a gray filter.
To shorten or lengthen the exposure time without changing the aperture value, you should adjust the ISO value (double ISO value = half exposure time and vice versa).
21. Focus & hyperfocal distance
Without a correctly adjusted focus, your photo or the main subject can become blurred. Most of the time you will do well by simply aiming at your main subject and focusing (with a relatively wide closed aperture) on it. Alternatively, you can focus on an object that lies in the first third of the image.
If you need to do it quickly: Target your main subject with autofocus.
Another (sometimes awkward and error-prone) option is to manually set the focus to the hyperfocal distance (also called hyperfocal distance or hyperfocal distance).
This is the distance you need to focus on at a given aperture-focal length combination to achieve the maximum depth of field (DOF). If you focus at the hyperfocal distance, the depth of field extends from half the hyperfocal distance (near point) to infinity.
To calculate the hyperfocal distance, there are various apps and websites such as http://www.dofmaster.com/dofjs.html.
The hyperfocal distance is calculated from the set aperture and focal length and also depends on the camera sensor used.
Here you can find some examples of the hyperfocal distance (all data refer to full format):
Aperture Focal length Hyperfocal distance
| Aperture | Focal length | Hyperfocal distance |
| 8 | 14 mm | 83 cm |
| 16 | 14 mm | 42 cm |
| 8 | 50 mm | 10,5 Meter |
| 16 | 50 mm | 5,3 Meter |
| 8 | 200 mm | 167 Meter |
| 16 | 200 mm | 84 Meter |
| 8 | 400 mm | 667 Meter |
| 16 | 400 mm | 334 Meter |
Tip for the wide-angle lens: If this is too complicated for you, set the focus manually to “just before infinity”. By the way, the infinity symbol is the horizontal figure eight. High-quality lenses usually have a distance scale that allows you to set the focus manually. System cameras usually also show you the focus setting on the display or in the viewfinder in manual focus mode.
Of course, with the setting “just before infinity” you give away some depth of field. But you will hardly notice the difference with a relatively wide closed aperture.
With a telephoto lens, it gets a bit more complicated (always depending on the subject), since you are not only giving away a few centimeters of the depth of field but sometimes hundreds of meters. My everyday tip: It usually makes sense to focus on the main subject. If the foreground disappears in the blur, this can even be a pretty exciting design tool.
Download: Our photographer’s cheat sheet with all camera settings
You can download our photographer’s cheat sheet here for free (PDF) and print it out in credit card format (85.6 × 54.0 mm). Best on thin cardboard, of course.
22. The RAW format
With this camera setup, you’re already one step closer to shooting great landscape photos. Next, go to your camera menu and activate the RAW format.
RAW format (“raw data format”) contains much more image information than the compressed JPG format.
For great landscape photos, you should always use the RAW format. Personally, I have also activated the JPG format (smallest setting). You always have to develop a RAW first – you can’t just send it quickly to friends via Whatsapp and Co.
23. Image Editing
Once the image has been taken, the next step is to develop your RAW files. Just like a film in analog times, a digital photo must be developed.
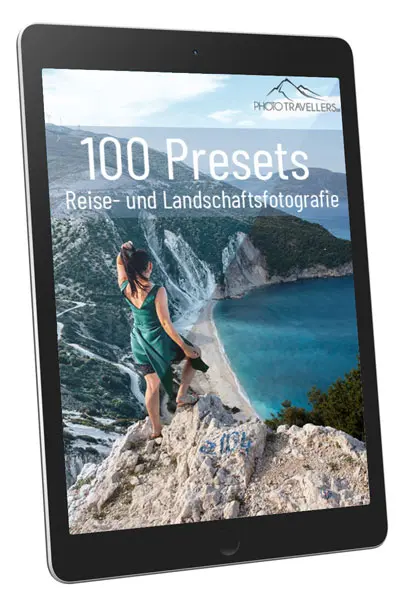
With programs like Adobe Lightroom* or Luminar*, you can straighten the horizon or remove dust spots, vignetting, or distortions. Fine-tuning involves things like contrast, sharpness, or individual color channels. Presets with predefined settings are also available on the Internet. Of course, you can use them – or you can try them out and find your own photographic style.

By the way, here you can find our Lightroom presets for travel and landscape photographers. Sign up for our newsletter here and get five free presets. Immediately after signing up, you’ll receive an email with a link to download them 😊. This way you can try out whether the presets fit your photos and whether everything works with the installation.
My latest tips for landscape photography
24. No rule without an exception
Of course, there is no rule in photography that you can’t break. However, you should know the basic rules of photography before you break them again. You will always encounter situations that force you to break one rule or another.
25. Practice makes perfect
With this guide to better landscape photos, you’re guaranteed to take better landscape pictures in the future. If you’re still at the beginning of your photography career, let me tell you: practice makes perfect. In addition to theory, practice is very important. So grab your camera and look for a nice photo subject to set it properly in the scene.
Always consciously try to follow the rules of landscape photography. You won’t shoot the perfect images overnight. Learning photography is a long and sometimes tedious process that is never finished.
If a photo shoot didn’t go perfectly the first time (you often only see this at home on the big screen), don’t get angry and try not to make the mistake next time.
You are always learning. That’s true for me, too. Whereas a few years ago I was obsessed with extreme wide-angle shots, today I’m focusing more and more on stunning photos with a telephoto lens.
If you’re not at all comfortable with a camera, you can easily make wonderful pictures with your mobile!
You might also be interested in